
| Product name | Reverse osmosis water dispenser | |
| Product model | W61 | |
| Rated voltage | 110V~ | 220V-240V~ |
| Rated frequency | 60Hz | 50Hz |
| Rated power | 1600WV | 2300W |
| Rated heating power | 1500W | 2200W |
| Rated cooling power | 110W | 120W |
| Water heating capacity | 16L/h(≥90°C) | 18L/h(>90°C) |
| Water cooling capacity | 3L/h(≤10°C) | |
| Working pressure | 0.4-0.6MPa | |
| Applicable water source | City water | |
| Applicable water temperature | 5-38°C | |
| Water tank capacity | 5L | |
| Net weight | 20kg | |
| Dimensions | 467x220x430mm | |
For compression equipment using combustible refrigerants, the manual should include information on how to install the equipment:
Direction 1: Forward
◇ When in designing a refrigeration system, full consideration should be given to the return oil of the system.
◇ Damaged compressors are not allowed to be used.
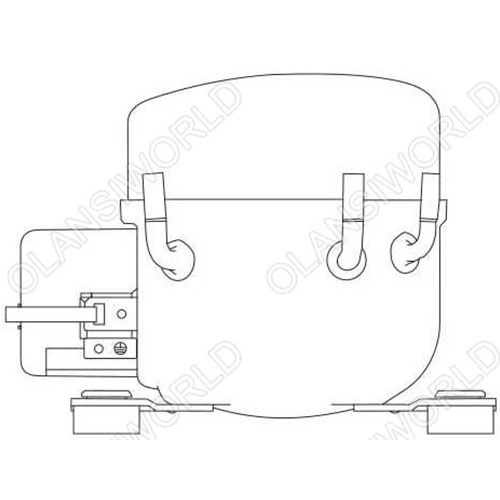
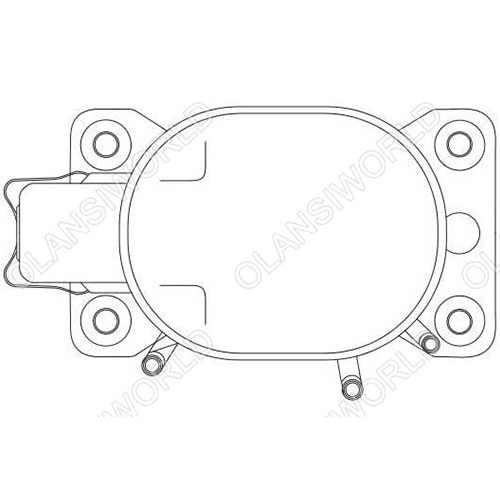
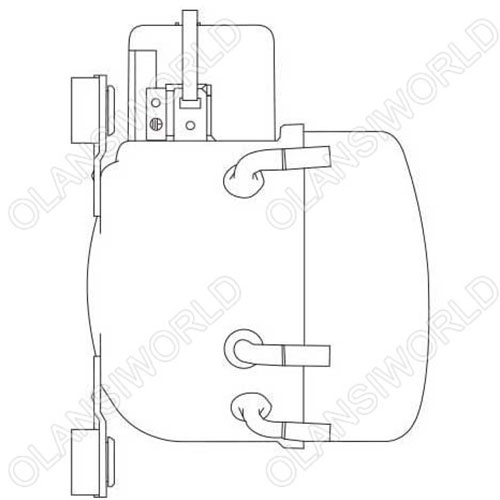
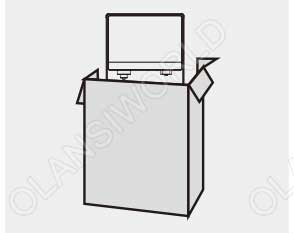
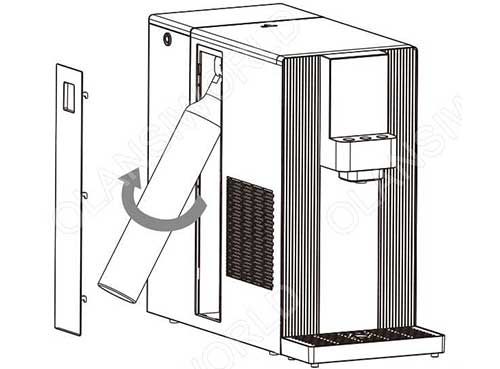
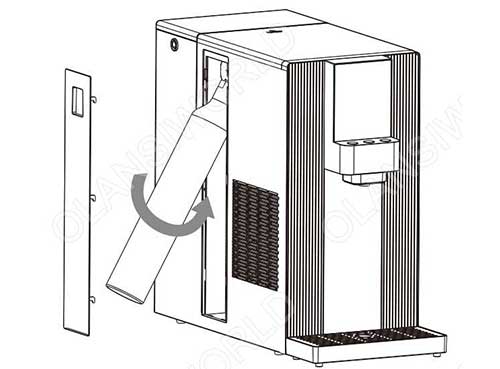
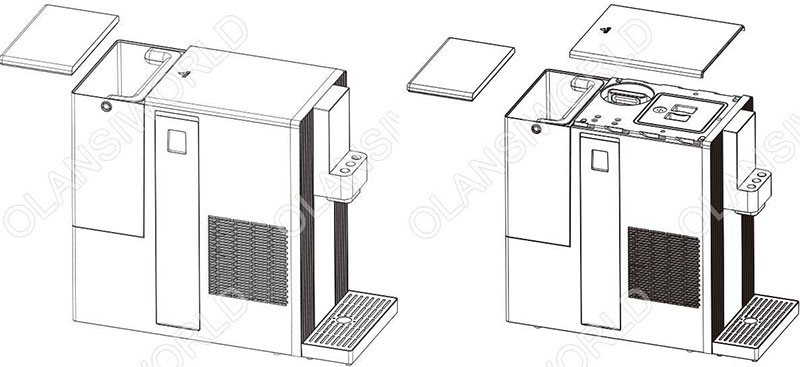
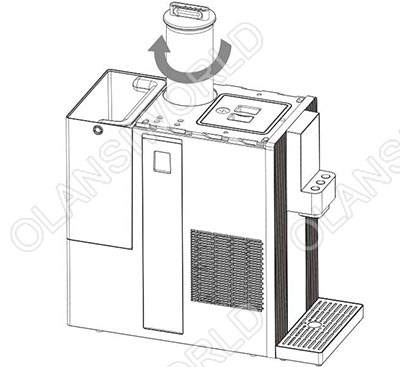
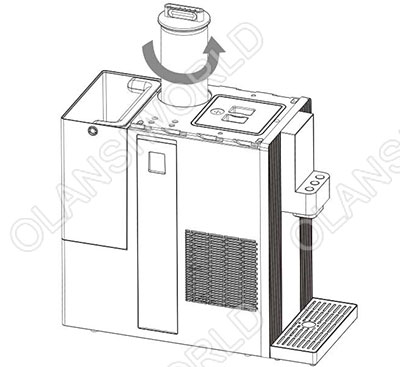
◇ After the compressor is installed on the box, it must always be kept vertical during transportation. Direction One as shown in the figure below. Priority should be given to “direction one” during loading and unloading, and in case of special circumstances, it must be turned to the side. When reversing, it is recommended to use “direction two” first, followed by “direction three”. Any adverse conditions caused by handling in other directions should not be related to the compressor itself, and our company will not assume any related responsibility.
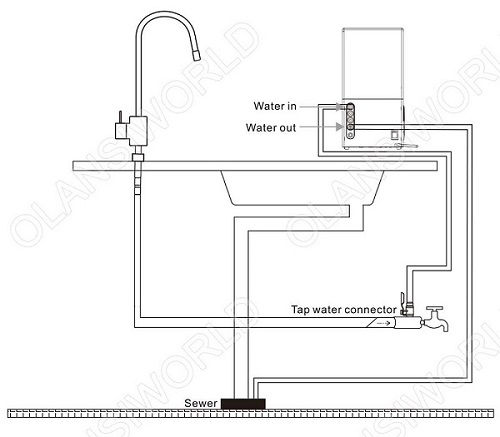
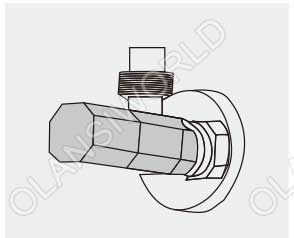
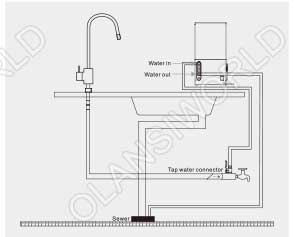
Installation instructions
System vacuum degree (compressor): 0.025Mpa
Non-condensable gases are limited to: 1%
Maximum connector opening time: 10 minutes
The compressor cannot withstand high voltage or start or operate under vacuum conditions, and cannot be used for system vacuum pumping.
The inclination between the compressor and the horizontal state during operation shall not exceed 5°.
Using non specified types of refrigeration oil: prohibited
Compressor return liquid: not allowed
The inventory period of the compressor after leaving the factory should not exceed 6 months.
If it exceeds 6 months, please check if the dry air in the compressor is sufficient and supplement it if necessary.
Optional mode : switch from water tank mode and pipe mode, default mode iswater tank.
Long press “Power”+ “Wash/Reset” for 3s, machine will buzzer for “Ding”, “G” will be shownon display panel. lt means that it has already been switched to pipe mode, andenter normal status after 10s showing “G” on display panel.
Long press “Power”+ “Wash/Reset” for 3s, machine will buzzer for “Ding”, “S” will be shownon display panel. lt means that it has already been switched to water tank mode.and enter normal status after 10s showing“S” on display panel.
Press “Wash/Reset” for operating washing mode when first used or replaced the filter.
1.Press to “Wash/Reset” drain out all the water in tank; please place water containersunderthe water outlets when in washing mode
2.After finished step 1, place the CO₂ tank to designated place for normal use.
Tips: CO₂ tank can not be placed designated position before cleaning.lt mustbe placed in machine after finished cleaning.
Step 1: Turn off the power supply, open the gas tank cover, hold the notch of the cover by your finger and pull it up to open the tank cover.
Step 2: When open the cover, hold the bottom of the bottle to pull outward, rotate the bottle by counterclockwise.
Step 3: Remove the sealing of new gas bottle, place the spout to the machine’s connector of relief valve. The connector can be pulled up to align with the bottle’s spout, rotating the bottle with clockwise and fix. Close the tank cover.
Step 4: After replacement of gas bottle, white writing of CO₂ will be shown in display panel again, means that the gas bottle has been fixed.
Step 1: Turn off the power, open the water tank cover, push backward the top lid of the machine.
Step 2: Rotate the filter counterclockwise and take it out upward.
Step 3: Assemble the new filter and rotate it by clockwise to tighten
Step 4: After replacing the filter element, click “Wash/Reset”to reset the filter element. After replacing the filter element, it is recommended to use the cleaning function to flush the new filter element.
Note: Original filter element must be used for replacement to ensure the safety of drinking water. For any abnormal situation during the replacement of filter element, please contact the customer service center in time
| Filter element for short | Type of filter element | Function | Recommended replacement period |
| RO | 4 in 1 RO Reverse osmosis composite filter element | Removal of impurities such as silt, rust, sand, suspended solid and blood worm; Removal of residual chlorine, germ, heavy metal and absorption of disagreeable tastes and odors; Prevent the growth of germ and improve the tastes. | 24 months |
Something isn’t Clear?
Feel free to contact me, and I will be more than happy to answer all of your questions.
Enter you email below, so we can send you this valuable report.