olansi logo blue 4

OLANSI W4/W5/W6 Undersink Water Purifiers — Product Instruction

olansi w4 w5 w6 undersink water purifiers

1. High Flux Reverse Osmosis Water Purifier

* Reverse osmosis filtration
* Three-in-one composite filter element
* 304 stainless steel tap
* Integrated water way plate
* Quiet operation
* WiFi or No WiFi

2.1 Remarks

In order to ensure the safety of use and avoid injuries and property losses to you and others, please be sure to observe the following safety precautions. Misuse without observing the safety warnings may lead to accidents.

11 olansi w4 w5 w6 remarks 1

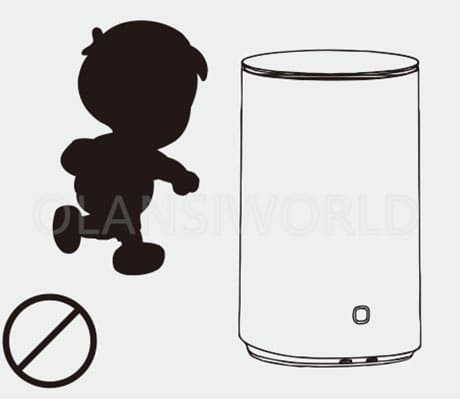
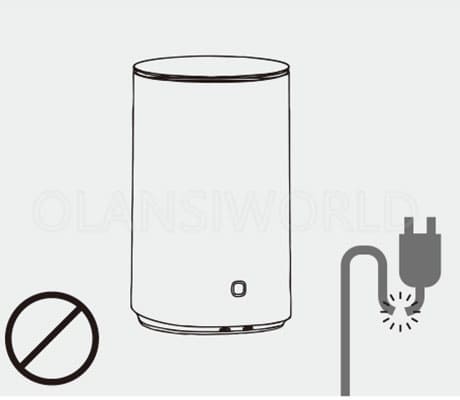
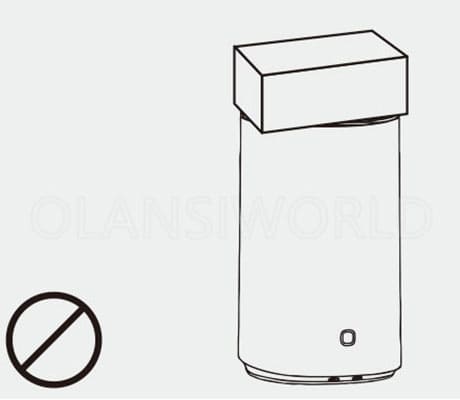
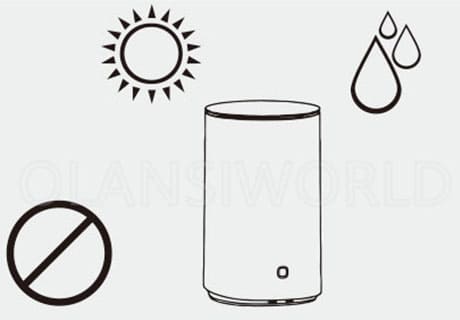
1. For IEC: This appliance is not intended for use by persons (including children) with reduced physical, sensory, or mental capabilities or lack of experience and knowledge unless they have been given supervision or instruction concerning the use of the appliance by a person responsible for their safety. Children should be supervised to ensure that they do not play with the appliance. If the supply cord is damaged, it must be replaced by the manufacturer, its service agent, or similarly qualified persons in order to avoid a hazard.

For EN: This appliance can be used by children aged 8 years and above and persons with reduced physical, sensory, or mental capabilities or lack of experience and knowledge if they have been given supervision or instruction concerning the use of the appliance safely and understand the hazards involved. Children shall not play with the appliance. Cleaning and user maintenance shall not be done by children without supervision.

11 olansi w4 w5 w6 remarks 2
2. If the supply cord is damaged, it must be replaced by the manufacturer or professional personnel from the maintenance department to avoid danger. Avoid squeezing, folding, knotting, or damaging the power line.
11 olansi w4 w5 w6 remarks 3
3. Avoid storing the product in places with strong sunlight, which may easily cause aging of product components, and avoid storing or exposing the product in an environment below 0°C.
11 olansi w4 w5 w6 remarks 4
4. The product must be installed or removed by professional personnel. The removal of parts on the product without authorization makes it easy to damage the product or cause electric shock. The moving and handling without authorization may easily cause improper operation and damage the purifier.
11 olansi w4 w5 w6 remarks 5
5. When the inflow water does not meet the municipal tap water standard (including large silt content and excessive residual chlorine, etc.), a pretreatment device should be installed in front of the product.
11 olansi w4 w5 w6 remarks 6
6. The best working pressure of this product is 0.1-0.4 MPa. If this water pressure is higher or lower than this value, please install apressure-boosting or reducing deviceaccordingly.
11 olansi w4 w5 w6 remarks 7
7. In case of any failure, please cut off the water source immediately and contact the local distribution servicenetwork.
11 olansi w4 w5 w6 remarks 8
8. When the ambient temperature is too low, the flow rate will decrease, which is an inherent characteristic of ROmembrane.
11 olansi w4 w5 w6 remarks 9
9. The strong magnetic appliances nearby may cause fire, product damage, or circuit failure.
11 olansi w4 w5 w6 remarks 10
10. Wet or dusty areas may cause circuit damage.
11 olansi w4 w5 w6 remarks 11
11. Do not place any heavy article on the product.
11 olansi w4 w5 w6 remarks 12
12. Please cut off the power and close the three-way ball valve in case of water failure or pipe maintenance. When restoring water supply, please open other taps to drain the silt before opening the three-way ball valve; otherwise, a large amount of silt may block the filter element.
11 olansi w4 w5 w6 remarks 13
13. Please do not connect the booster transformer to the power plug.
11 olansi w4 w5 w6 remarks 14
14. When cutting off the power, do not pull out the power line directly to avoid breakage.
11 olansi w4 w5 w6 remarks 15
15. Please keep the power plug clean and do not pull out the plug with wet hands
11 olansi w4 w5 w6 remarks 16
16. Please do not place flammable and volatile substances near this purifier.
11 olansi w4 w5 w6 remarks 17
17. Please keep the product away from heat sources or openfire.
11 olansi w4 w5 w6 remarks 18
18. Clean and replace the filter element regularly.
11 olansi w4 w5 w6 remarks 19
19. Be sure to use the accessories provided by the company.
11 olansi w4 w5 w6 remarks 20
20. It is normal for the product to generate slight vibration and noise when producing water.
11 olansi w4 w5 w6 remarks 21
21. Please install the product as close to the floor drain as possible.
11 olansi w4 w5 w6 remarks 22
22. If not using the product for a long time, please cut off the power and close the three-way ball valve. When using the product again, drain water for 3-5 minutes before normal use.
11 olansi w4 w5 w6 remarks 23
23. This product is a fully automatic water production system.It is normal for the product to automatically start water production or cleaning during use or when it is not used for a long time.
11 olansi w4 w5 w6 remarks 24
24. A 220V power socket is required within 1.5 m of this product. Please ensure that the power socket and the adapter are located indoors to prevent the influence of humid weather on the product.

2.2 Product structure and name

21 olansi w4 w5 w6 product structure and name 05

2.3 Display guide

23 olansi w4 w5 w6 display guide
With WiFi
23 olansi w4 w5 w6 display guide no wifi
No WiFi

3.1 Filter Element Configuration

SNAbbreviationsName of Filter ElementEffectLifetimeQty
1PC-CPP + Carbon + Carbon Composite Filter ElementRemoves sediment, rust, suspended solids, residual chlorine and odor from water; improves water taste6–12 months1 pc
2ROReverse Osmosis Membrane Filter ElementRemoves bacteria, viruses, organic matter, heavy metals, ions, etc.18–36 months1 pc

3.2 Basic Parameters

Parameter ItemWRO400-W4WRO500-W5WRO600-W6
Model No.WRO400-W4WRO500-W5WRO600-W6
Water Production Capacity400 GPD500 GPD600 GPD
Rated Total Pure Water5000 L5000 L5000 L
Rated Voltage110V-240V~110V-240V~110V-240V~
Rated Total Power64 W64 W90 W
Purified Water Flow>1.0 L/min>1.2 L/min≥1.5 L/min
Working Pressure of RO Membrane0.4-0.8 MPa0.4-0.8 MPa0.4-0.8 MPa
Inlet Pressure0.1-0.4 MPa0.1-0.4 MPa0.1-0.4 MPa
Applicable Water QualityMunicipal Tap WaterMunicipal Tap WaterMunicipal Tap Water
Applicable Water Temperature5°C-38°C5°C-38°C5°C-38°C
Environment Temperature for Using4°C-40°C4°C-40°C4°C-40°C
Net Weight7.84 kg7.84 kg7.84 kg
Product Sizeφ240×395 mmφ240×395 mmφ240×395 mm

Special Tips
1. The filter element replacement cycle is not a warranty period. It is a recommended maintenance cycle under the conditions that raw water meets national drinking water standards and normal household usage.
2. The replacement cycle is an estimated reference. The actual service life varies depending on the region, water quality, water consumption and seasons.
Only timely and correct filter element replacement can ensure safe and clean drinking water.

3.3 Maintenance

Daily maintenance is essential for water purification equipment to prevent malfunctions caused by improper upkeep, avoid risks to drinking water safety, and ensure stable product operation.
1. Do not use highly volatile solvents (e.g., soap, detergent, gasoline, ethyl alcohol) for cleaning and maintenance, as these may cause cracking, scratching, or discoloration of the product surface.
2. Do not clean the purifier by directly spraying water onto it.
3. Regularly check for accumulated water around the product to identify potential water leakage issues.
4. Inspect the product’s outlet tap for signs of leakage.
5. Ensure the concentrated water pipe is securely fixed and free from looseness.
6. Before leaving for an extended period, confirm that the product power supply and water inlet switch (three-way ball valve) are turned off.
7. Do not place the product sideways, horizontally, or upside down.
8. Do not modify the product’s joints or pipes without authorization.
9. Do not store or use the product in environments where the temperature is below 0°C.
10.Do not expose the product or its pipelines to direct sunlight.

4.1 Flow chart of water treatment

31 olansi w4 w5 w6 flow chart of water treatment

4.2 Schematic diagram of circuit

32 olansi w4 w5 w6 schematic diagram of circuit

4.3 Self-inspection of Abnormalities

The following guidelines cover the identification and troubleshooting of common issues. If simple troubleshooting fails to resolve the problem, DO NOT disassemble or repair the product by yourself, as this may cause danger or damage to the water purifier.
1. A slight noise generated by the water pump during filtration is normal; you can use the product with confidence.
2. For complex issues encountered during use, please refer to the troubleshooting methods below. If the problem persists, contact your dealer for assistance.

PhenomenaPossible ReasonsTroubleshooting Methods
No water output or low water flow1. Clogged filter element
2. Low tap water pressure
Cut off the water supply and contact the dealer
Filter element indicator flashes1. Expired filter element service life
2. The product has entered timeout mode
1. If the filter element indicator flashes red, the filter element needs to be replaced
2. If the reset button indicator flashes red, the product has entered timeout mode and requires a power restart

4.4 Schematic Diagram for Waterway Installation

33 olansi w4 w5 w6 schematic diagram for installation of water way
1. Outlet Tap; 2. Basin ; 3. Main Unit; 4. Inlet Ball Valve ; 5.Sewer

5.1 Full Machine Installation

41 olansi w4 w5 w6 installation of complete machine 1
1. Take the product out of the packaging box and place it under the kitchen cabinet.
41 olansi w4 w5 w6 installation of complete machine 2
2. Take out the inlet ball valve and mount it on the angle valve.
41 olansi w4 w5 w6 installation of complete machine 3
3. Connect the pipelines and install the water tap in accordance with the Waterway Installation Schematic Diagram (see the diagram on the right; refer to Page 9 for the enlarged version).
41 olansi w4 w5 w6 installation of complete machine 4
4. The concentrated wastewater can be either directly discharged into the sewer or collected for recycling.

5.2 Installation Precautions

51 olansi w4 w5 w6 precautions for installation 1
1. Take the product out of the packaging box and place it under the kitchen cabinet.
51 olansi w4 w5 w6 precautions for installation 2
2. Verify the inlet water pressure, which must fall within the range of 0.1–0.4 MPa. Install a pressure reducing valve if the actual water pressure exceeds this range.
51 olansi w4 w5 w6 precautions for installation 3
3. Ensure the installation environment temperature complies with the product’s operating temperature requirement of 4–38°C.
51 olansi w4 w5 w6 precautions for installation 4
4. Select a proper installation location, such as cabinet water inlets or balconies with easy access to water sources. Strictly prohibit installation in areas exposed to direct sunlight or rain.
51 olansi w4 w5 w6 precautions for installation 5
5. Check whether the user’s pipeline connected to the water purifier is rationally routed and free from aging damage.
51 olansi w4 w5 w6 precautions for installation 6 1
6. Ensure the PE pipe insertion depth reaches 15–17 mm: measure and mark the PE pipe before installation, then insert it into the machine until it reaches the position of the black mark.
51 olansi w4 w5 w6 precautions for installation 6
7. Use only the original accessories provided by the manufacturer.
51 olansi w4 w5 w6 precautions for installation 7
8. Conduct a tightness test on the three-way ball valve to confirm there is no water seepage or leakage.
51 olansi w4 w5 w6 precautions for installation 8
9. Do not place the product sideways, horizontally, or upside down.
51 olansi w4 w5 w6 precautions for installation 9
10. Do not use an unflushed filter element: flush the filter element for 1–3 minutes before putting it into service.
51 olansi w4 w5 w6 precautions for installation 10
11. Ensure all connector pins are properly installed and not missing.
51 olansi w4 w5 w6 precautions for installation 11
12. Do not fold or kink the pipelines during installation.
51 olansi w4 w5 w6 precautions for installation 12
13. Do not insert the wastewater pipe into the user’s sewer without proper arrangement; secure the drainage pipe firmly with cable ties at all times.

6.1 Operation Instructions

Start-up

61 olansi w4 w5 w6 operation instructions 1
1. Open the inlet ball valve to connect the tap water supply, then power on the product.
61 olansi w4 w5 w6 operation instructions 2 1
2. When the buzzer emits a "ding" sound, the blue indicator between the two filter element indicators labeled PCC+RO will light up for 3 seconds. Meanwhile, the three indicators at the reset key will cycle through blue, orange, and red, displaying Flush/Reset. After 3 seconds, the display will return to the normal state.

Shutdown

61 olansi w4 w5 w6 operation instructions 1
Close the inlet ball valve first, then unplug the power plug.

Water taking

61 olansi w4 w5 w6 operation instructions 4
A small amount of black water may flow out when the tap is turned on for the first time — this is normal. Note: This phenomenon only occurs when a new machine flushes its new filter elements for the first time.

6.2 Debugging of complete machine (With WIFI)

1. Open the inlet ball valve and plug in the power supply to start the machine.

61 olansi w4 w5 w6 operation instructions 1
2. Once the machine enters the normal water production state, press and hold the WIFI key for 3 seconds to enter the quick network configuration mode (refer to the separate WIFI Manual for detailed steps) and test the APP operation.

3. Network connection status indicated by WIFI icon:
* Flashing: In the process of connecting to the network
* Slow flashing: Connecting
* Steady on: Successfully connected

Button & Indicator Explanation
1)Flush/Reset Button (Touch Type)
* This indicator has three colors: blue, orange, and red (priority order: red light > orange light > blue light).
* Standby mode: Blue light stays on.
* Water purification in progress: Blue light flashes continuously.
* Automatic flushing in progress: Orange light stays on.
* Manual flushing in progress: Orange light flashes.
* Filter element expired or maintenance required: Red light stays on.
2)WIFI Touch Button
* Press and hold for 3 seconds to enter WIFI quick network configuration mode.
When activated, the two filter element indicators will flash pink at a frequency of 2Hz.
* For detailed network configuration steps, refer to the separate WIFI * Distribution Network Manual.

61 olansi w4 w5 w6 operation instructions 2

7.1 Maintenance Steps

71 olansi w4 w5 w6 maintenance steps 1
1. Check that all functions of the machine operate normally, then power off the machine and shut off the water supply.
71 olansi w4 w5 w6 maintenance steps 2
2. Inspect the overall appearance of the machine for any deformation.
71 olansi w4 w5 w6 maintenance steps 3
3. Check the connections of key components; pull gently on the PE pipes at each connection point in turn to confirm they are fully inserted in place.
71 olansi w4 w5 w6 maintenance steps 4
4. For filter element replacement: Determine whether replacement is needed based on the filter element’s usage time, service life, and indicator prompts.
71 olansi w4 w5 w6 maintenance steps 5
5. Restore the water supply to allow the product to produce water normally, then use dry tissues to check all connections for signs of water leakage.

7.2 Filter Element Replacement

61 olansi w4 w5 w6 operation instructions 2 1

1. Filter Element Service Life Indicator Guide
Both PC-C and RO filter element indicators use three colors to show service status:
* Blue light: Normal service life
* Orange light: 20% service life remaining
* Red light: Service life expired (replacement required immediately)

2. RO Filter Element Indicator Guide
The RO filter element indicator also features three color statuses to reflect its service life:
* Blue light on: The filter element is within its normal service life.
* Orange light on: 20% of the service life remains (pre-replacement reminder).
* Red light on: The service life has expired (replacement is required immediately).

81 olansi w4 w5 w6 replacement of filter element 2

3. Take out the upper cover and pull out the filter element handle.

81 olansi w4 w5 w6 replacement of filter element 3

4. Press and hold the end of the filter handle, then pull it toward the unlock direction.

81 olansi w4 w5 w6 replacement of filter element 4
5. Remove the old filter element and install the new filter element into the corresponding filter cartridge.
81 olansi w4 w5 w6 replacement of filter element 5

6. Hold the end of the filter handle and push it in the lock direction until you hear a click (indicating the filter element is securely locked in place).

81 olansi w4 w5 w6 replacement of filter element 6
7. Replace and fasten the top cover of the machine.
61 olansi w4 w5 w6 operation instructions 2 1
8. Reset the filter element service life Press and hold the Flush/Reset button for 3 seconds to enter the reset mode. Then press the button briefly to select the filter element that was just replaced (the corresponding filter indicator will flash). Press and hold the Flush/Reset button again for 3 seconds to complete the reset — the filter service life will restart counting from zero.
9. Post-replacement flushing operation Restore the water supply and power to the machine. Press the Flush/Reset button manually; the orange light will flash, which means the filter element is being flushed and cleaned. Once the orange light stops flashing, press the button again, and the machine will switch to normal working state.

Related Videos: Installation Guide

Related Videos: W4 Water Purifier

More Posts

Table of Contents

请在浏览器中启用JavaScript来完成此表单。
OLANSI
OLANSI HEALTHCARE CO.,LTD
WhatsApp
邮箱

Need Help?

I’m Here To Assist You

Something isn’t Clear?


Feel free to contact me, and I will be more than happy to answer all of your questions.

WATER & Air Purifier Market Size, Share, Analysis, Forecast
Price Value $4000+

Enter you email below, so we can send you this valuable report.